Server
The Freeseer Server tool communicates with the Freeseer Record tool over a network. The server can be used to start, stop, pause, and resume recording.
Usage
- Open freeseer-server
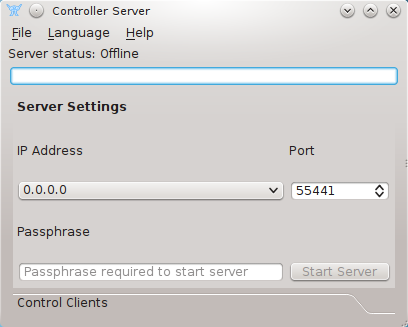
Main server interface
Before clicking “Start Server” button, you need to select the IP and port you wish to listen for connections on. 0.0.0.0 will listen on all available IP Addresses. Additionally selecting a passphrase for the server this password is needed by Freeseer clients and must match what is configured on the server in order to successfully connect to the server. This passphrase is not secure and is simply a simple check to ensure the client is connecting to the right server.
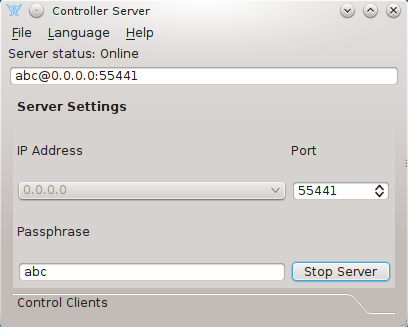
Server interface while running
Once the server is running the server connection details will appear in the text box at the top. This is a convenience feature which you can use to copy and paste the settings in the client dialog.
Pressing “Stop Server” will stop the server.
Clicking the “Control Clients” tab will switch to a view that will allow you to see all clients currently connected to the server.
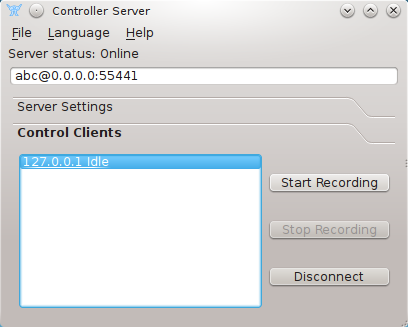
A client is connected
From here we can tell the client to start, pause, or stop recording. Client’s status is shown next to the IP address of the client. Right now the client is idle so we can start recording. When the “Start Recording” button is pressed the client’s status will change. According to the client’s status, the buttons will updated with the appropriate labels.
Clients can also be disconnected if “Disconnect” button is triggered. The Client can also be disconnect from client side.
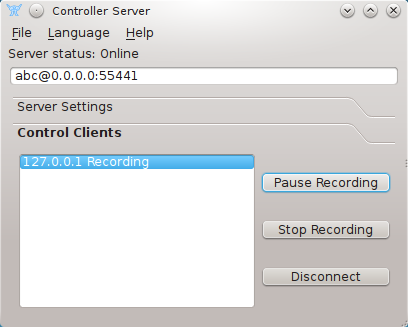
Client in recording state
When client is recording we could pause or stop recording. Triggering the appropriate button will send the action to the client.
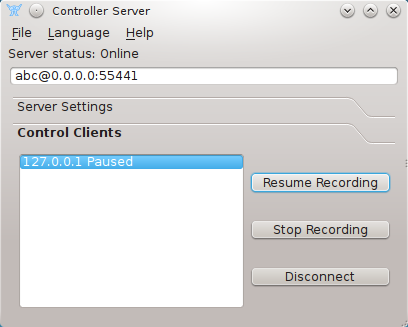
Client in paused state
When recording is paused it can be resumed or it can be stopped.